tutorial
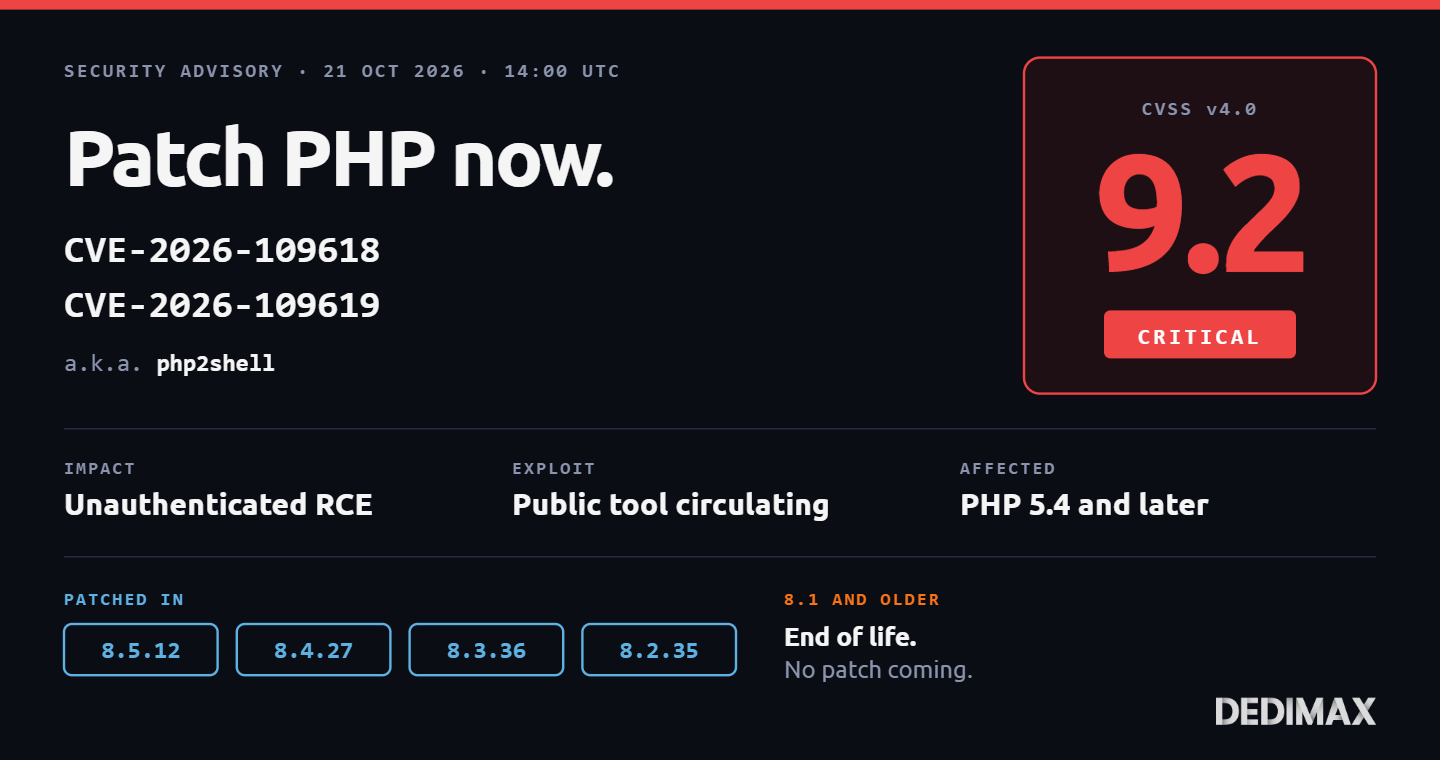
Critical PHP RCE Vulnerabilities (CVE-2026-109618 & CVE-2026-109619): What To Do Right Now
Two critical remote code execution vulnerabilities in PHP were patched today, October 21, 2026 at 14:00 UTC. T...

Everyone with a server knows they should back up. Most people even have something in place. What separates real backup strategies from theatre is whether you've ever successfully restored under pressure. The moment you actually need to recover, you find out whether your setup works or whether you've been paying for false comfort.
This guide is for sysadmins and small operations teams running production workloads. It covers the 3-2-1 rule (and why the common interpretation is often wrong), how to build a working Restic-based backup pipeline, how to test restores properly, and what to actually do when something has gone wrong. The goal isn't to explain what backups are. It's to give you a strategy that holds up when you need it.
Before getting into the how, it's worth naming the failure patterns that show up over and over in real recovery scenarios.
The untested backup. You have nightly snapshots going somewhere. You've never tried to restore a full system from them. You don't know how long it takes. You don't know if the destination is still writable. You don't know if the encryption key is still where you think it is. This is the single most common failure mode.
The onsite-only backup. Your backups live on the same server, or on a NAS in the same rack, as the systems they protect. A fire, a flood, a ransomware event that pivots through your network, or a full-site power incident takes both out at once. Your backups need to be somewhere else, physically.
The single-copy backup. One backup is one bit-flip away from a corrupt archive. Modern backup tools verify integrity, but verification catches corruption. It doesn't fix it. You need multiple copies.
The "hot" backup. Rsyncing a running database is a great way to end up with a backup that won't start. Backups of stateful services need coordination with the service (database dumps, LVM snapshots, or filesystem-level consistency).
The forever-retained backup. Some organizations keep every backup ever, forever. This is expensive and it means when something is compromised, the malicious version is preserved alongside the good one. You want retention policies that discard old data and keep the recent history you actually need.
The credentials that live on the machine being backed up. If your only copy of the S3 credentials or the encryption passphrase is on the server that just died, you can't restore. Credentials live in a password manager, on paper in a safe, or split across multiple physically separated locations. They don't live only on the machine.
Every one of these failure modes has taken out real production systems. The strategy in this guide addresses them directly.
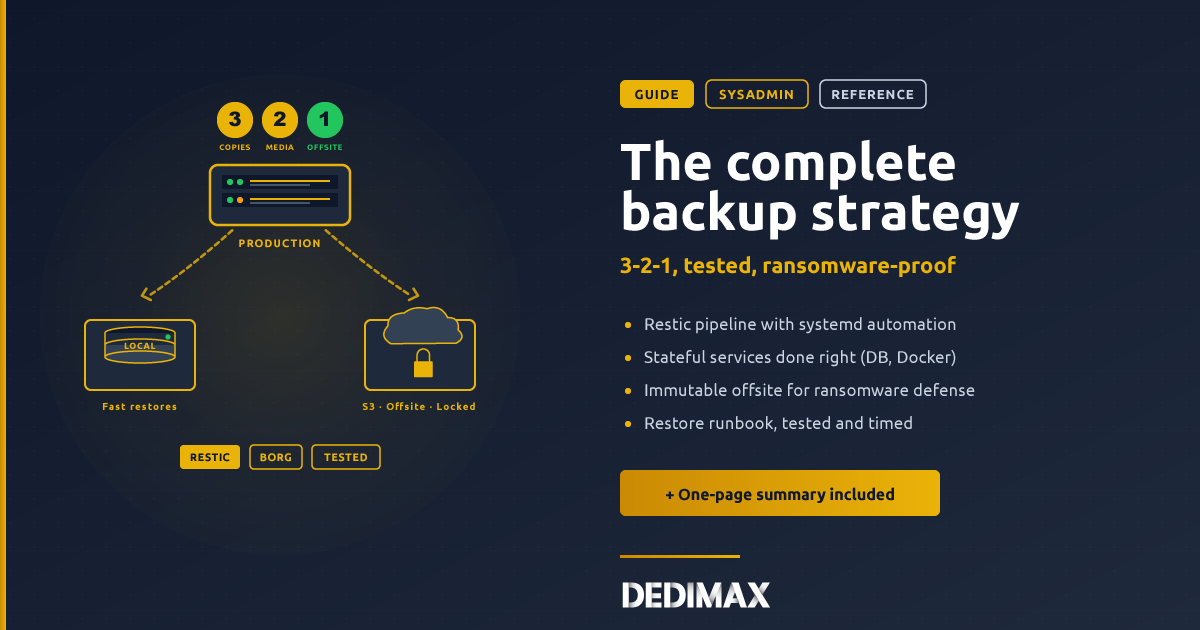
The 3-2-1 rule is the shortest useful summary of a real backup strategy:
Where most implementations go wrong is treating "copies" and "media" as synonymous with "different files". Three files on the same disk is not three copies. Two folders on the same NAS is not two media.
A correct implementation:
The offsite copy is what saves you from ransomware, physical disasters, or a provider-wide incident. The local copy is what makes routine restores fast. The production data is what you use every day. All three serve different failure modes.
Modern practice adds a fourth expectation: 1 tested restore. If you haven't restored from a backup in the last quarter, you don't have a backup. You have a bet.
For self-hosters and small operations teams, two backup tools dominate the space. Both are mature, both are actively maintained, both support the workflow this guide describes.
Restic is the primary tool this guide uses. It's written in Go, ships as a single binary, and works out of the box with S3-compatible object storage, SFTP, local paths, and dozens of other backends. It handles deduplication, encryption, integrity checking, and retention policies natively. Restic's ecosystem includes wrappers like resticprofile and autorestic that simplify complex configurations.
Borg is the mature alternative. Older, slightly faster on some workloads, with excellent deduplication. Its major limitation is that it doesn't natively support object storage as a destination. You need rclone or a filesystem mount in between. For self-hosters who prefer to back up to SFTP or a directly-attached filesystem, Borg is excellent. For anyone using S3-compatible storage as their offsite target, Restic is simpler.
Both encrypt data client-side before it leaves the machine. Both deduplicate at the block level. Both have solid integrity checking. Pick either and stick with it. Mixing them is possible but adds complexity for no real gain.
The rest of this guide uses Restic in examples. The concepts translate directly to Borg with minor syntax differences.
Install Restic on the machine you want to back up. On Debian and Ubuntu:
apt install restic -yVerify the version:
restic versionYou want 0.17 or newer. If your distro ships an older version, download the latest binary from the Restic GitHub releases page and drop it in /usr/local/bin/.
Restic calls the destination for your backups a "repository". Where you put the repository is your first architectural decision, and it drives everything else.
Local disk: fastest, cheapest, but violates 3-2-1 on its own (it's the same physical location as the source). Useful as your fast local copy for routine restores.
A dedicated backup server on your network: separate physical hardware, fast to read and write, useful for both routine restores and disaster recovery within your own infrastructure. Combine it with an offsite copy to satisfy 3-2-1.
SFTP to a remote server: works well when you have another server in a different location. Restic connects over SSH and writes the repository as files on the remote filesystem.
S3-compatible object storage: the most common offsite destination in 2026. Any provider offering an S3-compatible API works with Restic natively, without any additional tooling. This includes both hyperscaler storage services and dedicated backup providers with cheaper long-term pricing.
For most sysadmins running a small operation, the practical answer is to run two Restic repositories: one on a local NAS or backup server for fast restores, one on S3-compatible object storage for the offsite copy. Both are updated on the same schedule from the same source.
Restic uses a passphrase to encrypt everything. Choose a strong one and store it in your password manager. If you lose it, your backups are unrecoverable. This is the point.
For a local repository:
export RESTIC_REPOSITORY=/mnt/backup/restic-repo
export RESTIC_PASSWORD_FILE=/root/.restic-password
echo "your-strong-passphrase-here" > /root/.restic-password
chmod 600 /root/.restic-password

restic init
For an S3-compatible remote repository:
export RESTIC_REPOSITORY="s3:https://your-s3-endpoint/bucket-name"
export AWS_ACCESS_KEY_ID="your-access-key"
export AWS_SECRET_ACCESS_KEY="your-secret-key"
export RESTIC_PASSWORD_FILE=/root/.restic-password

restic init
The s3: prefix works with any S3-compatible endpoint. The URL after it tells Restic where to connect.
For long-term storage, use a service-account credential with permissions scoped to only the backup bucket. If those credentials leak, the damage is limited to that one bucket.
Once your repository is initialized, backing up is a single command:
restic backup /etc /home /var/www /var/lib/docker/volumesThe first backup is slow because it uploads everything. Subsequent backups only send changed blocks thanks to deduplication and are typically an order of magnitude faster.
Restic outputs a summary at the end:
Files:        1234 new, 0 changed, 0 unmodified
Dirs:         89 new, 0 changed, 0 unmodified
Added to the repository: 4.523 GiB (2.891 GiB stored)
processed 1234 files, 4.523 GiB in 3:12
snapshot abc123def4 saved
The snapshot ID at the end is what you'll use to restore.
Rsyncing a running database file gives you a corrupt backup. This bites people every year.
For each stateful service you run, use its own dump or snapshot mechanism, then back up the dump file.
PostgreSQL:
pg_dump -U postgres -Fc mydb > /var/backups/mydb-$(date +%Y%m%d).dumpMySQL / MariaDB:
mysqldump --single-transaction --routines --triggers mydb | gzip > /var/backups/mydb-$(date +%Y%m%d).sql.gzMongoDB:
mongodump --db mydb --out /var/backups/mongodb-$(date +%Y%m%d)/Redis:
redis-cli BGSAVE
# then back up /var/lib/redis/dump.rdb
Docker volumes with running containers: for stateless volumes, back up the volume path directly. For stateful containers (databases, queues), use the tool's dump mechanism from inside the container, write the dump to a bind-mounted host directory, then back up that directory.
The pattern is the same in every case: get a consistent point-in-time file, then back up that file. Never back up a live database's on-disk files directly.
A backup that requires you to remember to run it is not a backup. Automate everything through systemd or cron.
Create /usr/local/bin/backup.sh:
#!/bin/bash
set -euo pipefail

# Timestamp for logs
DATE=$(date --iso-8601=seconds)
echo "[$DATE] Starting backup"

# Dump databases first
pg_dumpall -U postgres | gzip > /var/backups/postgres-all.sql.gz
mysqldump --all-databases --single-transaction --routines --triggers | gzip > /var/backups/mysql-all.sql.gz

# Local repository
export RESTIC_REPOSITORY=/mnt/backup/restic-repo
export RESTIC_PASSWORD_FILE=/root/.restic-password
restic backup \
    --tag daily \
    /etc /home /var/www /var/backups /var/lib/docker/volumes

# Retention on local repo: keep 7 daily, 4 weekly, 6 monthly
restic forget --prune \
    --keep-daily 7 \
    --keep-weekly 4 \
    --keep-monthly 6

# Offsite repository
export RESTIC_REPOSITORY="s3:https://your-s3-endpoint/bucket-name"
export AWS_ACCESS_KEY_ID="your-access-key"
export AWS_SECRET_ACCESS_KEY="your-secret-key"
restic backup \
    --tag daily \
    /etc /home /var/www /var/backups /var/lib/docker/volumes

# Retention on offsite repo: keep more history
restic forget --prune \
    --keep-daily 14 \
    --keep-weekly 8 \
    --keep-monthly 12 \
    --keep-yearly 3

echo "[$DATE] Backup complete"
Make it executable:
chmod +x /usr/local/bin/backup.shCreate a systemd service at /etc/systemd/system/backup.service:
[Unit]
Description=Nightly backup
After=network-online.target
Wants=network-online.target

[Service]
Type=oneshot
ExecStart=/usr/local/bin/backup.sh
StandardOutput=journal
StandardError=journal
And a timer at /etc/systemd/system/backup.timer:
[Unit]
Description=Nightly backup timer

[Timer]
OnCalendar=03:00
Persistent=true
RandomizedDelaySec=15min

[Install]
WantedBy=timers.target
Enable it:
systemctl daemon-reload
systemctl enable --now backup.timer
Backups now run every night at 03:00 (plus up to 15 minutes of jitter to avoid load spikes across many servers).
Check status with systemctl status backup.timer and follow logs with journalctl -u backup.service -f.
Running the backup is only half the job. Restic can verify the integrity of its repositories, and you should schedule that separately.
Add to your weekly cron or systemd timer:
restic check --read-data-subset=10%This reads 10% of the data blocks and verifies their checksums. Full data verification (--read-data) is expensive on large repositories. A rolling 10% subset each week covers the whole repository over ten weeks, which is a reasonable trade-off between cost and detection.
If restic check reports errors, don't panic and don't overwrite the healthy backup. Investigate first. Sometimes it's a transient network issue. Sometimes it's a real corruption you need to address before it spreads.
A backup you have never restored is a hope, not a strategy. Test the restore quarterly at minimum, monthly if you can afford the time.
The full test procedure:
restic restore latest --target /The last point matters more than most people think. Knowing you can restore in 30 minutes versus 12 hours changes your incident response completely.
Document the exact procedure. When you actually need to restore, at 3 AM under stress, you want a runbook, not a memory quiz.
The reason offsite backups exist is that adversaries who compromise your infrastructure will attempt to destroy your backups. Modern ransomware specifically hunts for and destroys backup repositories before deploying the encryption payload.
Restic has two protective features for this:
Append-only mode. Restrict the credentials used by your backup job so they can only add data to the repository, not delete or modify existing data. For S3-compatible storage, this is enforced through IAM policies scoped to s3:PutObject and s3:GetObject on the specific bucket, without s3:DeleteObject. The restic forget --prune step needs to run from a separate machine with elevated credentials, not from the machine being backed up.
Object lock (S3-compatible immutability). Many object storage providers support setting a retention period during which objects cannot be deleted, even by administrators. Enable this on your backup bucket with a retention period matching your recovery objective (7, 14, or 30 days).
Together these mean that even if your production server is fully compromised and its credentials extracted, the attacker cannot destroy the backups they need to hold you hostage.
Backups exist for two categories of events: routine operational recovery (someone deleted a file, a service ate its data) and disaster recovery (the whole server is gone or compromised). Handle them differently.
Routine recovery (single file, a database dump, a config that got clobbered):
# List snapshots
restic snapshots

# Restore a single file from the latest snapshot
restic restore latest --target /tmp/restore --include /etc/nginx/nginx.conf

# Or restore a whole directory
restic restore abc123 --target /tmp/restore --include /var/www/site
Restore to a temporary directory first, verify the content, then move the files where they need to go. Never restore directly over production without checking.
Disaster recovery (full server rebuild):
restic restore latest --target / --include /etcrestic restore latest --target / --include /var/www --include /var/lib/docker/volumesDocument this sequence for your specific stack. When you're actually in a recovery scenario, the runbook eliminates decision-making at exactly the wrong time.
A backup that silently fails for a month is worse than no backup at all. Monitor them.
The simplest setup uses Uptime Kuma with a push monitor. Add this to the end of your backup script:
curl -fsS -m 10 --retry 5 -o /dev/null https://your-uptime-kuma/api/push/YOUR_TOKEN?status=upUptime Kuma expects a ping from your backup job at least once per configured interval. If it doesn't hear from you in 25 hours (for a nightly job), it triggers an alert.
For teams, escalate on failure to a real notification channel (Slack, Discord, email, PagerDuty). A monitoring alert that only shows up in a dashboard nobody looks at is not monitoring.
Backup storage sits in a different tier from production storage. It's cold, written once, read rarely. Object storage is priced accordingly, but only if you use the right tier and lifecycle policies.
Typical costs for backup storage in 2026 are in the range of a few euros per terabyte per month for standard object storage, and a fraction of that for archive tiers if you're willing to accept slower retrieval times. For most self-hosters and small operations, backup storage costs sit in the low tens of euros per month for the range of data volumes involved.
For the local copy, a dedicated backup server or NAS with ample disk capacity is usually the right investment. On Dedimax dedicated servers, the storage-optimized configurations are a good match for both running production services and backing them up locally. All plans include unlimited bandwidth, which matters when initial backup uploads can move hundreds of gigabytes.
If you take nothing else from this guide, this is the summary version:
restic check --read-data-subset=10%.Backups are not exciting work. They rarely justify their cost until the day they save your organization. The strategy above is what real recovery looks like when it works. Set it up once, test it, then set a calendar reminder to test it again next quarter.
Deploy your own VPS
300+ apps in one click, full root access, ready in minutes.
From 9,99€/mes
Two critical remote code execution vulnerabilities in PHP were patched today, October 21, 2026 at 14:00 UTC. T...
Clicking through a panel to provision a VPS, trigger a reboot, or change a reverse DNS record is fine when you...
If you've ever provisioned a fresh VPS and spent the next two hours installing Docker, pulling images, writing...
Toma el control de tu servidor dedicado (configuraciones, datos...) sin límites en el uso de aplicaciones.
Que estas esperando ?
Te esperamos en nuestro blog. Guías y tutoriales publicados regularmente (sysadmin, gaming, devops...) !
Permítame verificar