
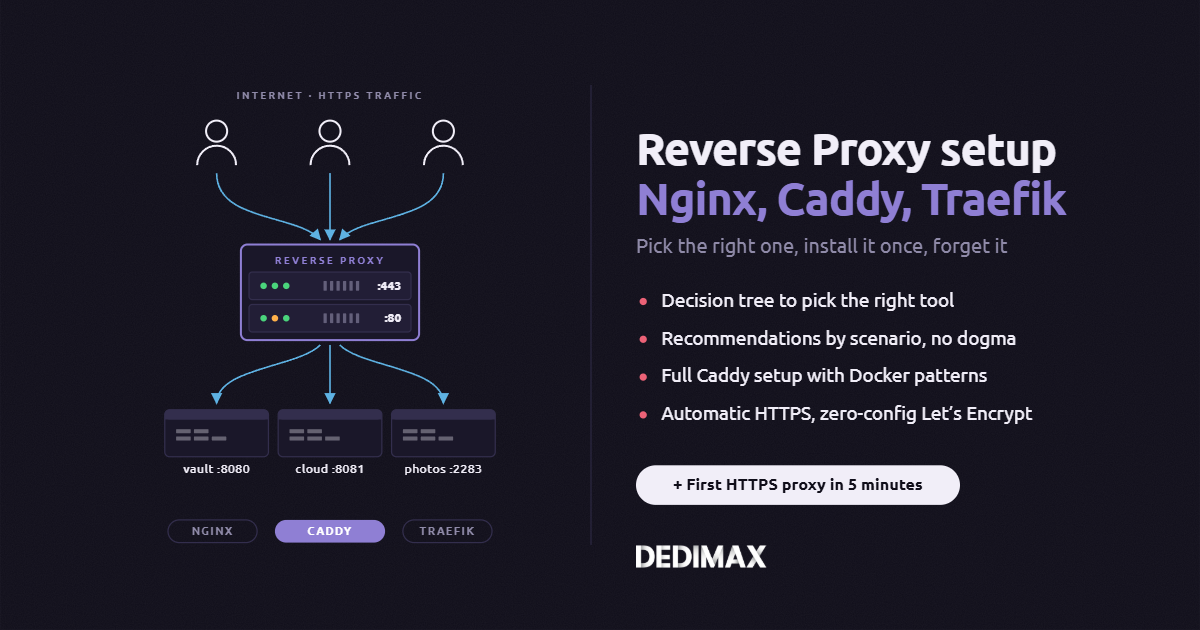
Almost every guide on this blog eventually says "put a reverse proxy in front of it." Vaultwarden needs one. Stoat needs one. Immich needs one. Anything you self-host with HTTPS needs one. But which reverse proxy you should actually pick is a question we've dodged until now, because there's no single right answer.
There are three serious options: Nginx, Caddy, and Traefik. All three are mature, actively maintained, and can handle whatever you throw at them. The interesting question isn't "which is best" but "which is best for your specific situation". The answer depends on how many services you run, whether Docker is central to your setup, and how much time you want to spend maintaining configuration files.
This guide walks through a quick decision tree to figure out which one you should use, gives specific recommendations by scenario, then walks through the full setup of the tool most self-hosters should default to. If you're running more than one service on a server, or you're about to, this is the article to read before you keep going.
Nginx is the battle-tested veteran. It's been around since 2004, it runs a large chunk of the public web, and its performance under load is the yardstick everything else gets measured against. Configuration is a text file, and the syntax has grown a lot of features over the years. If you've ever fought a location {} block that behaved weirdly, you know Nginx has personality. But it works, at scale, forever.
Caddy is what happens when someone in 2015 asks "what if a reverse proxy just handled HTTPS for you." The Caddyfile is genuinely readable. Automatic Let's Encrypt certificates are the default behavior, not a plugin. It's written in Go, ships as a single binary, and its performance is close enough to Nginx that the difference doesn't matter for most self-hosters. It's the tool most people who try it end up sticking with.
Traefik is the Docker-native option. Its core trick is that it watches your Docker API (or Kubernetes, or Consul) and configures routes from container labels. Add a new service to your Docker Compose file with the right labels, and Traefik picks it up automatically, requests a certificate, and starts routing traffic. If your entire stack is Docker Compose, this is genuinely magical. If it isn't, the label syntax is friction you don't need.
Answer these questions in order. Stop at the first one that describes you.
1. Is your entire stack in Docker Compose, and do you add or remove services more than once a month? → Use Traefik. Container labels do the work you'd otherwise do by hand. The learning curve pays for itself within weeks.
2. Are you running a high-traffic site (10K+ requests per minute), a load balancer for internal services, or a setup with complex routing rules and Nginx modules? → Use Nginx. The pure-performance headroom and the mature module ecosystem handle edge cases the other two can't.
3. Everyone else (1 to 10 self-hosted services, mixed Docker and non-Docker, want the least maintenance possible)? → Use Caddy. This is where most self-hosters land, and the automatic HTTPS alone justifies the choice.
If you're new to self-hosting and none of the questions above obviously match you, default to Caddy. You'll get to production fastest, and if you outgrow it later, switching to Nginx or Traefik is straightforward because your services and DNS don't change.
Solo self-hoster or small team, 1-5 services: Caddy. You'll spend more time on the services themselves than on the proxy, which is what you want.
Docker-heavy home lab, 10+ services, frequent additions: Traefik. The auto-discovery removes the "add a service, then remember to also configure the proxy" step.
Production web application, high traffic, need fine control over caching, load balancing, rate limiting: Nginx. The features you'll need at that scale are all there and battle-tested.
Small business self-hosting a stack (Nextcloud, Vaultwarden, wiki, etc.): Caddy. Fewer moving parts, fewer things to maintain, easier to hand off to another person if you leave.
You want a GUI to click through instead of editing files: Nginx Proxy Manager (NPM), which is Nginx wrapped in a web interface with automatic Let's Encrypt. Not covered in depth here because most of our audience is comfortable with text config, but a valid choice if a dashboard genuinely helps you or the people who'll run the server.
You inherited an existing Nginx config: Keep Nginx. There's no reason to migrate a working setup unless you have a concrete problem to solve.
Since Caddy is the right choice for the majority of self-hosters reading this, the rest of the article walks through a complete setup. If you fell into the Traefik or Nginx branch above, we'll cover those in future articles. For now, this is the Caddy install every new server should have.
If you haven't hardened SSH on the server yet, read our SSH hardening guide first. And if the firewall isn't configured, our UFW firewall guide is the 5-minute prerequisite.
Caddy publishes an official APT repository. Add it once, then install cleanly:
apt install -y debian-keyring debian-archive-keyring apt-transport-https curl
curl -1sLf 'https://dl.cloudsmith.io/public/caddy/stable/gpg.key' | gpg --dearmor -o /usr/share/keyrings/caddy-stable-archive-keyring.gpg
curl -1sLf 'https://dl.cloudsmith.io/public/caddy/stable/debian.deb.txt' | tee /etc/apt/sources.list.d/caddy-stable.list
apt update
apt install caddy
Verify the install:
caddy versionYou should see v2.x.x. Caddy's systemd service is enabled and started automatically by the package.
Check that it's running:
systemctl status caddyAt this point Caddy is serving the default welcome page on port 80. Open http://your-server-ip in a browser to confirm.
Caddy's important files:
/etc/caddy/Caddyfile: your configuration/var/lib/caddy/.local/share/caddy/: certificate storage (Let's Encrypt cache)/var/log/caddy/: access logs (once you enable them)The Caddyfile is what you'll edit. Everything else usually takes care of itself.
Replace /etc/caddy/Caddyfile with your actual configuration. Here's the simplest useful setup, proxying a single backend service running on localhost:3000:
app.yourdomain.com {
    reverse_proxy localhost:3000
}
That's it. That's the complete config for one HTTPS-enabled reverse proxy. Caddy will:
app.yourdomain.com on the next startupValidate the syntax:
caddy validate --config /etc/caddy/CaddyfileIf it reports no errors, reload the service:
systemctl reload caddyWatch the logs to confirm certificate provisioning:
journalctl -u caddy -fWithin 30 seconds you should see a line about a successfully obtained certificate. Open https://app.yourdomain.com in a browser. Working HTTPS, valid certificate, first try.
Each service is one block. A Caddyfile with three services:
vault.yourdomain.com {
    reverse_proxy localhost:8080
}

cloud.yourdomain.com {
    reverse_proxy localhost:8081
}

photos.yourdomain.com {
    reverse_proxy localhost:2283
}
Reload after each edit:
systemctl reload caddyEach new service gets its own certificate automatically. No plugin installation, no cron job for renewal, no reading the Let's Encrypt rate limit documentation. This is why Caddy wins for most self-hosters.
Most self-hosted apps run in Docker containers. Two patterns work well.
Pattern A: Docker binds to localhost, Caddy proxies to it
In your service's docker-compose.yml, expose the port only to localhost:
services:
  vaultwarden:
    image: vaultwarden/server:latest
    ports:
      - "127.0.0.1:8080:80"
    volumes:
      - ./data:/data
Then in the Caddyfile:
vault.yourdomain.com {
    reverse_proxy localhost:8080
}
This is the simplest approach and works for almost every scenario. Caddy runs on the host, the containers bind to localhost, everyone is happy.
Pattern B: Caddy runs in Docker on the same network
If you're running Caddy itself in Docker (some prefer this for portability), put it on the same Docker network as your services and reference them by container name:
vault.yourdomain.com {
    reverse_proxy vaultwarden:80
}
Where vaultwarden is the container name in Docker. Caddy resolves the name via Docker's internal DNS.
The first pattern is what we recommend for most setups. The second is useful when you want the reverse proxy to be part of the containerized stack, but it adds a layer of complexity that isn't necessary for a small number of services.
A few configuration snippets you'll want to know.
WebSockets (required by many modern apps like Stoat, Nextcloud Talk, Uptime Kuma):
Caddy handles WebSockets automatically. If your app uses them, they just work.
Large file uploads (raise the default request size limit):
cloud.yourdomain.com {
    reverse_proxy localhost:8081

    request_body {
        max_size 100MB
    }
}
Static file serving (for a landing page or documentation site):
yourdomain.com {
    root * /var/www/mysite
    file_server
}
Basic authentication (simple username/password protection for internal tools):
admin.yourdomain.com {
    basicauth {
        alice $2a$14$HASH_HERE
    }
    reverse_proxy localhost:9000
}
Generate the hash with caddy hash-password. Never hand-write bcrypt hashes.
Access logs (per site):
app.yourdomain.com {
    reverse_proxy localhost:3000

    log {
        output file /var/log/caddy/app-access.log {
            roll_size 100MB
            roll_keep 5
        }
    }
}
Logs are useful for troubleshooting and monitoring but consume disk. Enable them where you need them, not everywhere.
If you're following our UFW guide, make sure ports 80 and 443 are open:
ufw allow 80/tcp
ufw allow 443/tcp
ufw reload
Port 80 is required for Let's Encrypt HTTP-01 challenges. If you close it, certificate issuance will fail unless you configure DNS-01 challenges (which is a topic for the future Let's Encrypt article).
Do NOT open port 8080 or any of the backend service ports to the internet. That's the whole point of the reverse proxy: backends stay bound to localhost, only 443 is public.
Caddy is the right default for most self-hosters, but not for everyone forever. Signals that you've outgrown it:
Absent one of these clear signals, don't migrate for the sake of migrating. A working reverse proxy is boring infrastructure, and boring is exactly what you want here.
However you configure it, monitor it. A reverse proxy that silently starts failing takes every service behind it down at once, and you find out from your users.
At minimum:
The number of self-hosted outages that come down to "the reverse proxy failed to reload and nobody noticed for a day" is higher than you'd think.
This guide gets you a working Caddy reverse proxy for most self-hosted setups. Some topics we've intentionally left for future articles:
For now, if you're deploying anything new on a VPS or dedicated server, start with Caddy, get comfortable with the Caddyfile syntax, and only consider the other options when you have a concrete reason to.
The reverse proxy is quiet infrastructure. Choose the one that stays out of your way, set it up once, and move on to the more interesting problems.
Take control of your dedicated server (settings, data ...) without any limits in apps usage.
What are you waiting for ?
We’re waiting for you on our blog. New guides and tutorials published regularly (sysadmin, gaming, devops...) !
Let me check